Heat Pump Reverse Valve Stuck: Quick Troubleshooting Guide
Urgent troubleshooting guide to diagnose and fix a heat pump reverse valve stuck, with step-by-step checks, safety tips, and professional help guidelines.

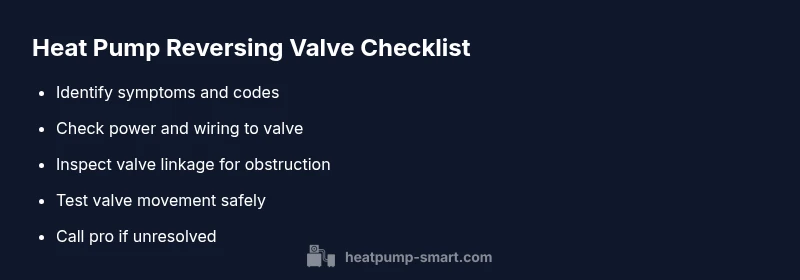
The most likely cause of a heat pump reverse valve stuck is debris, corrosion, or wear in the valve assembly preventing movement. Start with simple checks: confirm system status, listen for valve coil click, and inspect for unusual cycling or temperature swings. If you detect the valve isn't moving, avoid forcing it; follow the diagnostic flow and proceed to safe fixes, then contact a pro if the issue persists.
Why the heat pump reverse valve matters for operation
The heat pump reverse valve controls the switching between heating and cooling modes. When the valve fails to actuate, the system may default to one mode, cycle abnormally, or produce inconsistent temperatures. The issue is particularly challenging when the valve is stuck in the wrong position, causing poor efficiency and comfort. According to Heatpump Smart, the reliability of a reversing valve is central to energy savings and comfort. In many installations, the valve is a small solenoid or hydraulic actuator that physically shifts flow paths inside the refrigeration circuit. A failure is rarely instantaneous but often develops from debris, corrosion, wear, or electrical faults. Recognizing the difference between a valve sticking and a sensor fault is important: a faulty sensor could imitate a stuck valve but would still respond to control signals if the actuator is intact. For homeowners and property managers, understanding this distinction helps you triage correctly and prioritize professional service when needed. In this guide we walk through symptoms, safe checks, and practical fixes you can perform without special tools. By staying proactive, you reduce the risk of compressor damage, refrigerant leaks, or extended downtime.
Common symptoms indicating a stuck valve
A heat pump reverse valve stuck presents with a consistent pattern of faults. You may notice: mode confusion where the unit heats in cooling or cools in heating, abrupt temperature swings and longer cycling than normal, reduced heating or cooling performance, audible valve clacks when calling for a change in mode (or no click at all), and outdoor unit icing or frosting due to improper refrigerant flow. Inconsistent pressure or superheat readings can appear when the valve is physically jammed. If you observe any combination of these signs, treat it as urgent and use the diagnostic flow below. Remember that other issues—low refrigerant, dirty filters, or faulty thermostats—can mimic valve problems, so a careful, methodical approach is essential.
Safety first: precautions before diagnosing
Shut off power to the outdoor and indoor units at the main service panel and the disconnect switch near the outdoor unit. Lockout/tagout if you’re on a multi-person job site. Wear protective eyewear and gloves when inspecting electrical harnesses or the outdoor unit, and avoid touching refrigerant lines. Refrigerants under pressure can cause severe injuries; if you suspect a leak, evacuate the area and contact a licensed technician. Never bypass safety devices or force components to move. If you’re uncomfortable with electrical checks or you don’t have the right tools, stop and call a professional.
Diagnostic approach: how to confirm the valve is stuck
Start with simple checks: confirm the thermostat is calling for the correct mode, listen for the reversing valve actuator cycling during mode changes, and observe outdoor coil temperatures. Use the service manual to test coil resistance and control circuit signals. Look for abnormal position indicators on any diagnostic panel. If you can safely access the valve, inspect linkage for obstruction or binding. Document codes or LED indicators, as this helps a technician pinpoint the fault quickly. If the valve shows no movement and you’ve eliminated thermostat and electrical wiring faults, the issue is likely the valve or its actuator.
Step-by-step fixes you can try safely
- Power down and secure the system: Turn off the thermostat and outdoor disconnect. Wait 60 seconds before restoring power. 2) Inspect for obstructions: Clear debris around the outdoor unit and valve area; ensure coils are clean and free of ice. 3) Check wiring and connections: Look for loose plugs, damaged insulation, or corrosion at the valve coil harness. 4) Verify control signals: Ensure the thermostat is sending valid heating/cooling commands and that any service modes are not active. 5) Attempt a safe reset: Reset the thermostat and, if applicable, the system’s microcontroller according to the manual. 6) Plan for professional help if stuck: If movement remains blocked, do not force the valve and prepare model numbers and recent maintenance details for the technician. Tip: Never work on live refrigerant lines; always depressurize safely or call a licensed pro.
When to call a professional and what to expect
If you’ve completed the safe checks and the valve still won’t move, it’s time to involve a professional. A technician will test the coil resistance, verify electrical signals, and inspect the valve assembly for debris, corrosion, and binding. Expect potential valve replacement or actuator repair, refrigerant pressure checks, and a short downtime window. By documenting symptoms, codes, and recent maintenance, you help the technician diagnose faster and protect system efficiency.
Prevention tips to avoid future valve sticking
- Schedule regular maintenance in the shoulder seasons to catch wear and debris before they affect the valve.
- Keep outdoor units clear of leaves, dirt, and snow to minimize contaminants reaching the valve linkage.
- Replace air filters, inspect ductwork, and ensure proper refrigerant charge as part of routine checks.
- Use a reputable HVAC professional for any valve work and refrigerant handling to avoid leaks and safety hazards.
Steps
Estimated time: 45-60 minutes
- 1
Power down and secure the system
Turn off the thermostat and outdoor disconnect. Wait 60 seconds before restarting. This clears residual controls and reduces shock risk when inspecting wiring.
Tip: Verify power with a non-contact tester before touching electrical parts. - 2
Inspect for obstructions and clean
Clear leaves or debris from the outdoor unit and valve area. Ensure that the coil and valve linkage are clean and free from ice or dirt that could hinder movement.
Tip: A clean outdoor coil improves valve responsiveness and overall efficiency. - 3
Check valve coil wiring
Open the access panel and inspect the valve coil wiring for lubrication, corrosion, or loose connectors. Re-seat connectors with the power off, and look for signs of heat damage.
Tip: Do not force connectors apart; use proper tool if needed. - 4
Verify thermostat signals
Set the thermostat to a clear heating and cooling call and observe whether the actuator attempts to move during each call. Note any fault codes on the indoor control board.
Tip: Document codes to speed up professional diagnosis. - 5
Attempt a safe reset
If allowed by your model, perform a safe reset of the control board or system (per manual) to reinitialize the valve actuator logic.
Tip: Reset procedures vary; follow manufacturer guidance to avoid damage. - 6
Plan for professional service
If there is no valve movement after the checks, prepare to involve a licensed HVAC technician for valve testing/replacement.
Tip: Have model numbers, refrigerant type, and service history ready.
Diagnosis: Heat pump cycles abnormally; reversing valve movement appears hindered or absent
Possible Causes
- highValve mechanism seized by debris or corrosion
- mediumElectrical fault preventing valve coil from energizing
Fixes
- easyReset thermostat and system power to clear control signals
- easyInspect outdoor area and clean around the valve for obstructions
- mediumCheck valve coil wiring and connectors for damage or loose connections
- hardIf the valve still does not move, schedule professional testing/replacement
Your Questions Answered
What is the reverse valve in a heat pump and what does it do?
The reverse valve directs refrigerant flow to switch between heating and cooling modes. When it fails to actuate, the system may stay in one mode or switch incorrectly, reducing comfort and efficiency.
The reverse valve switches the refrigerant path for heating or cooling. If it sticks, your heat pump may not change modes properly.
What are the signs that the reverse valve is stuck?
Common signs include mode confusion (heating when cooling is called), unusual cycling, poor performance, and in some cases ice or frost around the outdoor unit.
Watch for the system not switching modes correctly, strange cycling, or frost around the outdoor unit.
Can you fix a stuck reverse valve yourself?
You can perform safe checks and cleaning, but many fixes require professional test equipment and refrigerant handling. Do not attempt valve replacement yourself unless you’re trained.
Some safe checks you can do, but valve work should be left to a pro.
Is a stuck reverse valve dangerous?
Working with refrigerants and electrical components can be hazardous. There’s a risk of refrigerant exposure and electrical shock, so prioritize safety and professional service when in doubt.
There are safety risks; consult a professional if you’re unsure.
When should I replace rather than repair the valve?
If the valve shows repeated failure, persistent sticking after safe checks, or recurrent codes, replacement is usually the most reliable option.
If it keeps failing, replacement is often the best option.
What maintenance reduces valve sticking?
Regular outdoor unit cleaning, proper refrigerant charge checks, and seasonal system checks by a qualified technician help prevent sticking.
Keep the unit clean, check refrigerant, and have seasonal checkups.
Watch Video
Top Takeaways
- Check the valve and wiring first, avoid forcing movement.
- Safety and methodical diagnosis prevent further damage.
- Call a professional if the valve remains stuck after safe checks.