Heat Pump Troubleshooting: Fast, Safe Fixes for Homeowners
A practical, urgent guide to diagnosing and fixing common heat pump issues. Learn a proven troubleshooting flow, step-by-step repairs, safety tips, and prevention strategies from Heatpump Smart.

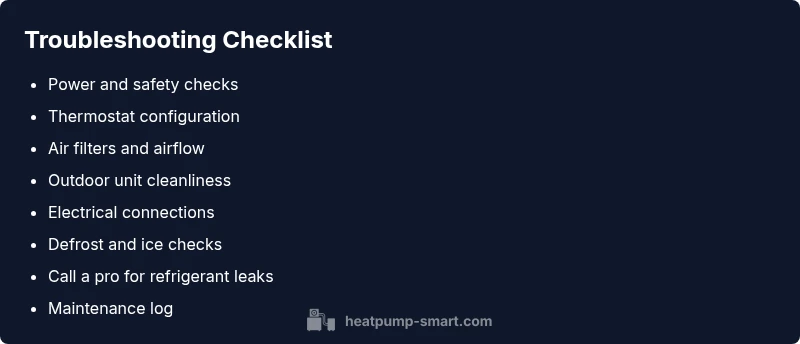
Begin with safety and quick checks: power, thermostat, and air filters. If the heat pump won't start, inspect the breaker and outdoor unit for ice or debris. For temperature inconsistencies, verify airflow and sensor settings. If basic fixes don’t resolve the issue, proceed through the diagnostic flow and follow the step-by-step guide for most common causes, then call a pro if needed.
Quick start: safety and baseline checks
When you begin troubleshooting a heat pump, safety is non-negotiable. Before you touch any wires or panels, shut off power to the unit at the main breaker and set the thermostat to Off. Use a non-contact voltage tester if you’re unsure whether power is present. Once the power is isolated, take a quick baseline read of physical conditions: is the outdoor unit free of snow, ice, and debris? Are air filters clean and readily accessible? Are all vents inside the home unobstructed? According to Heatpump Smart, many common heat pump failures trace back to basic maintenance gaps and simple electrical issues that a diligent homeowner can address safely. A calm, methodical approach beats frantic guessing every time. Start by confirming basic operating states: is the thermostat awake, and do the display and sensor readings look normal? If you answer yes, you can proceed to the next checks with confidence, knowing you’ve covered the safe baseline. The goal here is to establish a baseline so you can spot abnormalities more quickly later in the flow. If a quick check reveals frost on the outdoor coil or a clogged return vent, record the symptom and move to the next step.
No power or won't start: immediate checks
A heat pump that won’t start usually springs from an easily addressed cause. Begin by verifying the main breaker and any associated fuses—a tripped breaker is the most common culprit. If the outdoor unit is hard-wired, check the disconnect switch and ensure it is fully in the ON position. Next, inspect the thermostat: is it communicating with the system, are batteries fresh, and is the mode set to heat (or emergency heat in cold weather)? If the thermostat shows an error code, consult the manual or your installer for code definitions. Also inspect for loose wires or corrosion at the control board and contactor. If you’ve confirmed power, protection devices, and settings but the unit still won’t start, there may be a deeper electrical fault or a failure inside the air handler. Do not bypass safety devices—shutdown and call a licensed technician. Keep a log of the exact symptom, time of day, and any error codes to speed up service.
Temperature issues: cold air or inconsistent heating
When the heat pump runs but the air feels cool, verify the thermostat settings and system mode. Ensure the setpoint is high enough and that the unit is in Heat (or Emergency Heat in very cold weather). If you’re seeing a deficit in temperature, check the outdoor unit for ice buildup or restricted airflow, and inspect the indoor blower to confirm it’s circulating air. Defrost cycles can briefly reduce heating performance; this is normal if outdoor temperatures are low, but extended defrost should trigger a service check. Check the air filters and ductwork for blockages, and confirm there are no closed dampers or blocked returns. Heatpump Smart analysis shows that many faults stem from airflow or control settings rather than refrigerant issues, so start with airflow and thermostat checks before assuming a refrigerant leak.
Airflow problems: dirty filters and duct blockages
Low airflow is a silent killer for heat pumps. Start by inspecting and replacing dirty or saturated air filters. Even a few weeks of neglect can reduce heating efficiency dramatically. Next, inspect supply and return ducts for obstructions: furniture, drapes, or closed dampers can choke airflow. Ensure all vents are open and that the indoor blower is running smoothly with no unusual noises. If the house feels unevenly heated, check for blocked returns in hallways or closets. Regular maintenance—cleaning coils, checking fan blades, and sealing ducts—preserves efficiency and reduces energy costs. Poor airflow not only hurts comfort but forces the system to work harder, shortening equipment life and increasing wear on motors.
Noises, vibrations, and unusual sounds
Unusual sounds deserve prompt attention. Rattling from panels may indicate loose screws or panel shifts; buzzing can signal electrical contact issues, while a grinding noise could point to worn bearings or a failing fan motor. Squealing often stems from belt wear or a misaligned blower; hissing might reveal refrigerant or duct leaks. If you hear knocking or banging, shut down the system and inspect for loose components or debris on the outdoor unit. In many cases, simple fixes like tightening screws, clearing debris, or lubricating a moving part resolve the issue. If the noise persists after basic checks, contact a professional to assess bearings, mounting, or refrigerant-related components—these require specialized tools and training.
Ice buildup and defrost cycles
Ice on the outdoor coil disrupts heat transfer and reduces efficiency. Check for ice formation when the unit runs in heat mode, particularly during high humidity or very cold outdoor temperatures. Defrost cycles are automatic, but persistent icing indicates potential issues with airflow, thermostat signals, or a refrigerant restriction. Clear ice safely with a soft brush and avoid chiseling; ensure outdoor airflow is unobstructed and that the unit’s fins aren’t bent. If icing recurs, investigate the defrost control, sensor readings, and outdoor fan operation. Prolonged icing can damage coils and reduce system life, so do not ignore recurring frost.
Refrigerant, electrical faults, and when to call a pro
Refrigerant leaks or low refrigerant levels can silently cripple heating performance and trigger safety codes. Look for oily residue around connections, unusual pressure readouts, or frost on the suction line. Electrical faults—bad capacitors, blown fuses, or faulty contactors—manifest as intermittent starts or cycling issues. If you suspect refrigerant problems or internal electrical faults, do not attempt a DIY repair; refrigerant handling requires a licensed technician and safe recovery equipment. In most cases, persistent refrigerant or electrical faults demand professional intervention to prevent further damage and ensure system safety.
Maintenance habits to prevent issues
Preventive maintenance is your best defense against surprise outages. Schedule seasonal inspections, replace or clean filters every 1-3 months depending on usage, and clean outdoor coils to maintain heat exchange efficiency. Keep the area around the outdoor unit clear of vegetation and debris, and ensure safe clearance for airflow. A quick annual coil cleaning, belt inspection, and refrigerant checks (performed by a pro) can extend equipment life and improve energy efficiency. Maintain a simple log of symptoms, service dates, and part replacements so you can detect patterns over time and respond faster to future problems.
Using the diagnostic flow in practice: a practical example and next steps
Imagine a scenario where the heat pump starts but delivers cool air, with a sporadic defrost cycle. Start at the top of the diagnostic flow: safety and baseline checks were done, power is stable, thermostat reads correctly, and airflow seems good. The next symptom—cool air—points to thermostat configuration, airflow, or defrost timing. Confirm the Heat setting, verify the outdoor coil condition, and check for ice accumulation. If the airflow and defrost steps pass but temperature remains inconsistent, the issue may involve refrigerant or a control board fault. Throughout the process, document each step, any error codes, and the exact operating conditions. If at any point you encounter refrigerant issues, electrical faults, or persistent icing, escalate to a licensed professional. By applying the diagnostic flow with disciplined checks, you’ll identify the simplest fix first and escalate only when necessary. The Heatpump Smart team emphasizes safety and documentation as you work through the flow to minimize risk and downtime.
Steps
Estimated time: 45-60 minutes
- 1
Power down and verify safety
Shut off the heat pump at the main breaker and use a tester to confirm no live voltage. Wait a few minutes to discharge capacitors. Reassess the physical environment for obvious hazards before touching any components.
Tip: Always validate power before touching wires. - 2
Check thermostat and settings
Inspect the thermostat for correct mode (heat vs. cool), ensure the setpoint is appropriate, and replace batteries if needed. Confirm the system communicates with the outdoor unit and that there are no error codes on screen.
Tip: Reset the thermostat to factory settings if codes persist. - 3
Inspect air filters and indoor vents
Remove and inspect filters; clean or replace as needed. Make sure return vents and supply vents are open and unobstructed. Poor airflow can masquerade as heating inefficiency even when refrigerant is fine.
Tip: Record filter condition and date of replacement. - 4
Inspect outdoor unit and clear debris
Clear leaves, snow, or other debris around the condenser. Check for ice build-up on the coil. Ensure the fan spins freely without rubbing. A clogged outdoor unit reduces heat transfer and triggers longer defrost cycles.
Tip: Never poke at live electrical components while the unit is energized. - 5
Check breakers and electrical connections
Inspect the service disconnect, fuses, and all accessible wiring for signs of wear or corrosion. Tighten any loose connections and replace damaged wires or switches. If you see burning smell or discoloration, stop and call a pro.
Tip: Keep a detailed diagram of wire routes for service calls. - 6
Test run and verify operation
Power the unit back on and run a test cycle in heat mode. Observe startup behavior, blower operation, and whether indoor air reaches set temperature within a reasonable time. If abnormal sounds or excessive vibrations occur, power down again and seek professional evaluation.
Tip: Document cycle times and any odd indicators.
Diagnosis: Heat pump won't start or shows abnormal cooling/heating performance
Possible Causes
- highPower issue (tripped breaker, blown fuse)
- highThermostat misconfiguration or dead batteries
- mediumIce buildup or debris in outdoor unit
- lowLow refrigerant or refrigerant leak
Fixes
- easyReset breakers and replace blown fuses; restore power safely
- easyReplace thermostat batteries, re-sync settings, and verify mode
- easyClear ice/debris, ensure outdoor clearances, test defrost control
- hardCall a licensed technician for refrigerant issues and leak detection
Your Questions Answered
Why won’t my heat pump start?
Start issues are most often power-related, thermostat communication problems, or a tripped breaker. Check the main breaker, outdoor disconnect, thermostat settings, and any error codes. If power and configuration are fine, you may have a deeper electrical fault requiring professional inspection.
Most heat pumps won’t start due to power or thermostat problems. Check breakers, disconnects, and settings, and consult a pro if needed.
Why is my heat pump blowing cold air?
Cold air during heating usually means the thermostat is in cooling mode, the setpoint is too low, or airflow is restricted. Defrost cycles can also briefly reduce heating output. Verify mode, adjust the setpoint, and ensure filters and ducts are clear.
If your heat pump is blowing cold air, check mode and airflow first, then defrost status.
How can I tell if there’s a defrost problem?
Frequent defrost cycles or visible frost on outdoor coils indicate a defrost problem or airflow issue. Check outdoor unit ventilation, ice buildup, and sensor operation. If icing continues, call a technician to diagnose sensors and refrigerant flow.
Frequent icing means defrost control or airflow might be off—get a professional check if it keeps happening.
Can a dirty filter cause icing or poor heating?
Yes. A dirty filter reduces airflow, causing coils to freeze and performance to drop. Replace filters, inspect ducts for blockages, and ensure returns aren’t closed. Regular filter maintenance significantly improves efficiency.
Yes—dirty filters can lead to icing and poor heating; replace them and check ducts.
When should I call a professional?
Call a licensed technician for refrigerant leaks, electrical faults beyond basic inspection, or persistent icing after basic checks. Refrigerant work requires special training and equipment to ensure safety and code compliance.
Call a pro for refrigerant or electrical problems, or if icing persists after basic checks.
What can I do to prevent future heat pump problems?
Establish a simple maintenance routine: replace filters, inspect ducts, clean coils, and schedule annual professional checkups. Keeping log notes helps identify patterns early and reduces downtime.
Set a routine: clean filters, inspect ducts, and schedule yearly professional checks.
Watch Video
Top Takeaways
- Start with safety and baseline checks.
- Prioritize power, thermostat, and airflow issues.
- Document symptoms to speed up service.
- Escalate to a pro for refrigerant or major electrical faults.
- Maintain a proactive maintenance routine to prevent future faults.