How to Check a Heat Pump: A Practical Guide
Learn how to check your heat pump for performance and safety. This comprehensive guide covers diagnostics, essential tools, and when to call a pro to keep your system efficient.

Learn how to check your heat pump for performance and safety. This quick guide covers essential diagnostics, common signs of trouble, and when to contact a professional. According to Heatpump Smart, regular checks boost efficiency and comfort while reducing energy costs. Follow the steps to verify thermostat settings, airflow, drainage, refrigerant health, and electrical safety, with clear time estimates.
How to check heat pump: scope and goals
Regular checks of a heat pump focus on performance, efficiency, safety, and reliability. In this guide you’ll learn how to verify key indicators like thermostat alignment, airflow, drainage, refrigerant health, and electrical safety. You’ll also learn when it’s appropriate to call a licensed technician. By performing these checks, homeowners, builders, and property managers can catch problems early and preserve comfort while keeping operating costs in check. According to Heatpump Smart, regular checks boost overall system efficiency and extend equipment life, especially in variable climates. The primary objective is to confirm the system heats or cools as intended, without unusual noises or energy spikes. As you read, keep in mind that this guide emphasizes safe, methodical checks and clear documentation of findings for future service visits.
Safety and prep before you start
Working on a heat pump involves electrical components and refrigerant lines; safety must come first. Before any inspection, power down the system at the outdoor disconnect and the indoor controller, and use a lockout/tagout procedure if you’re responsible for a multi-tenant building. Wear PPE including gloves and eye protection. Check that the outdoor unit is free from standing water, debris, and snow. If you smell refrigerant or hear hissing sounds near lines, stop and call a pro. Use a flashlight to inspect connectors, wiring, and insulation; a small problem today can become a costly repair tomorrow. Keep a logbook to note dates, readings, and actions taken.
Quick diagnostics you can perform at home
Some checks are safe and simple for most homeowners. Start by confirming thermostat settings and mode (heat for cold months, cool for warm months), and ensure the thermostat target temperature is reasonable for the space. Check that the indoor blower is circulating air and that the outdoor unit isn’t blocked by leaves, snow, or furniture. Inspect the air filter and replace it if dirty; a clogged filter reduces airflow and efficiency. Look at the condensate drain and pan to ensure there is no standing water or overflow. Listen for unusual noises from the outdoor unit, and note any vibrations or banging that could indicate loose parts or mounting concerns.
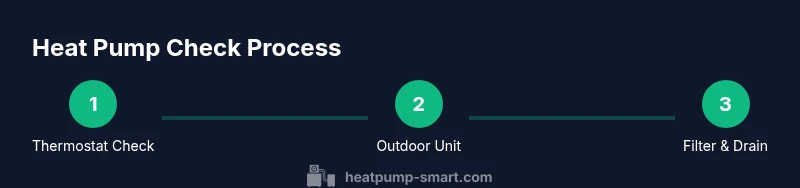
Step-by-step checks you can perform (overview)
This section provides a structured, action-oriented approach you can follow alongside the detailed steps below. Each task is designed to be completed safely and efficiently, with simple checks you can document for future reference. If you encounter any step that feels unclear or risky, stop and proceed to the formal Step-by-Step section or contact a professional.
Signs of trouble and what they mean
Look for reduced heating or cooling performance, unexpected short cycling, or a sudden spike in energy bills. Ice buildup on the outdoor coils or refrigerant lines can indicate low refrigerant or airflow problems. Persistent frost on the evaporator coil, unusual smells, or frequent system restarts are warning signs. If you notice these symptoms, record them and seek professional diagnosis promptly to prevent compressor damage.
Maintenance habits for ongoing efficiency
Set a regular maintenance schedule that includes filter changes, coil cleaning, and outdoor unit clearance checks. Schedule professional inspections at least once a year, especially before peak heating or cooling seasons. Keep a log of service visits, readings, and any codes displayed by the thermostat or inverter. Staying proactive with maintenance reduces emergency repairs and extends equipment life.
Authority sources and references
For authoritative guidance, consult: • https://www.energy.gov/energysaver/heat-pumps • https://www.energystar.gov/products/heating_cooling/heat_pumps • https://www.energy.gov/eere/buildings/articles/heat-pumps-101
When to call a professional
If you detect refrigerant leaks, electrical faults, visible damage to wiring, persistent frost, or unreliable operation after basic checks, stop DIY diagnostics and contact a licensed HVAC technician. Refrigerant handling and electrical work are hazardous and require certification. Pro maintenance can prevent safety incidents and protect warranty terms.
Tools & Materials
- Safety gear (gloves, safety glasses)(Electrical work and sharp components require eye and hand protection)
- Voltage tester or multimeter(To verify electrical connections and control voltages)
- Thermostat access (manual or app)(To verify settings and mode)
- Flashlight(Inspect coils, wiring, and condensate area)
- Soft brush or microfiber cloth(Clean filters and coil surfaces gently)
- Masking or duct tape(Temporary securing of loose components if needed)
Steps
Estimated time: 30-45 minutes
- 1
Check thermostat and mode
Confirm the thermostat is set to the appropriate mode (heat in winter, cool in summer) and that the target temperature aligns with the room’s actual temperature. If the system responds slowly or cycles on/off abnormally, note the time and any codes displayed. This ensures you’re diagnosing the right phase of operation before touching hardware.
Tip: If using a smart thermostat, verify that its online settings haven’t overridden local controls. - 2
Inspect outdoor unit clearance and debris
Clear at least 2 feet around the condenser. Remove leaves, snow, and tall grass that can restrict airflow. Check for any noisy components or loose panels and secure them if safe to do so. Poor airflow is a common cause of reduced efficiency.
Tip: Avoid spraying high-pressure water directly at the coils; use a soft brush to remove dirt. - 3
Check indoor air filter and blower
Inspect the air filter; replace if dirty or clogged. A clean filter improves airflow and efficiency. Ensure the indoor blower is running and there are no unusual noises from the air handler.
Tip: Replace disposable filters every 1-3 months depending on usage and household conditions. - 4
Check condensate drain and pan
Locate the condensate drain line and verify there’s no blockage. Ensure the pan is dry and there are no signs of overflow. A blocked drain can cause water damage and humidity issues inside the home.
Tip: If you see standing water around the unit, switch the system off and contact a professional. - 5
Inspect electrical connections and safety switch
Turn off power and check visible wiring for signs of wear or discoloration. Ensure the disconnect switch is functioning and that wiring connections are tight. Do not touch live conductors; call a pro if you detect burns or melted insulation.
Tip: Only perform basic visual checks; leave wiring repairs to a licensed technician. - 6
Listen for unusual noises and vibrations
With the unit running, listen for grinding, squealing, or banging noises. Vibrations at the outdoor unit may indicate loose mounting or fan issues. Document any odd sounds for the service visit.
Tip: Use a stethoscope app on a smartphone to localize unusual noises if available. - 7
Check refrigerant lines for frost or leaks
Inspect the copper refrigerant lines for frost buildup, which can indicate low refrigerant or airflow problems. Do not attempt to recharge refrigerant yourself; refrigerant handling requires a licensed technician.
Tip: If frost appears, switch the system off and wait 30 minutes before rechecking. - 8
Run a quick self-diagnosis and document
If your unit has a built-in diagnostic mode, run it and record any error codes. Keep a log of readings, dates, and actions taken for future service visits. This helps technicians diagnose issues faster.
Tip: Take photos of any error codes and attach them to your service request.
Your Questions Answered
Do I need a licensed professional to check my heat pump?
Some basic checks can be done safely by homeowners, but refrigerant handling and major electrical work require a licensed HVAC technician. Always consult a pro if you’re unsure.
Some checks you can do yourself, but refrigerant and major electrical work require a licensed professional.
How often should I check my heat pump?
Perform basic monthly checks (thermostat, airflow, and drainage) and schedule a professional inspection at least once a year, ideally before seasonal peaks.
Do monthly checks and have a yearly professional inspection.
What are common signs that my heat pump needs service?
Decreased heating or cooling performance, unusual noises, frost on coils, or rising energy bills are common indicators that service is needed.
Look for poor performance, strange noises, or frost on the coils.
Can I check refrigerant levels myself?
No. Checking or adding refrigerant requires licensed technicians and proper equipment to avoid safety risks and refrigerant regulations.
Don’t check refrigerant yourself; call a pro.
What tools do I need for basic checks?
A basic set includes safety gear, a flashlight, a thermostat access, and a simple multimeter for basic electrical checks.
Have safety gear, a flashlight, thermostat access, and a multimeter ready.
What should I log during checks?
Record dates, readings, any error codes, noises, and steps taken. This helps technicians diagnose issues faster in future visits.
Keep a log of dates, readings, errors, and notes.
Watch Video
Top Takeaways
- Verify thermostat settings before any inspection
- Keep outdoor clearance and filter clean for optimal airflow
- Document findings for future service visits
- Call a professional for refrigerant or electrical work