How to Turn On a Heat Pump Without a Thermostat: Safe Alternatives and Troubleshooting
Learn why turning on a heat pump without a thermostat is unsafe and explore Heatpump Smart–approved alternatives for diagnosing faults and restoring reliable control.

Turning on a heat pump without a thermostat is not recommended. A thermostat provides safe control, prevents overheating, and protects energy efficiency. If your thermostat fails, the safer path is to diagnose or replace it or use approved emergency controls. This guide explains why bypassing is risky, and what safer, manufacturer-aligned steps you can take to regain operation without compromising safety or warranties.
What it means to run a heat pump without a thermostat
According to Heatpump Smart, a thermostat is the primary interface that governs when your heat pump turns on, how long it runs, and at what efficiency level. Running a heat pump without this control is not just technically improper—it can lead to short cycling, poor humidity control, and unsafe temperatures inside the home. Even if the outdoor unit starts, it may not respond to room conditions in a predictable way, which can drive up energy bills and stress the equipment. Homeowners should view the thermostat as a safety and efficiency device, not simply a switch, and treat any attempt to bypass it as a last resort under professional guidance.
The takeaway for most homeowners is that a thermostat is essential for reliable, safe operation. If the thermostat is malfunctioning, the priority is to restore proper control, not to override the device. Heatpump Smart’s guidance emphasizes safety, warranty protection, and the importance of using approved control methods that align with the unit’s design and refrigerant cycles.
Why bypassing a thermostat is risky: safety, warranty, and refrigerant systems
Attempting to run a heat pump without a thermostat bypasses the built-in safeguards that prevent overheating, overcooling, and unsafe refrigerant cycling. Without a proper control signal, the compressor and outdoor fan can engage unpredictably, potentially causing compressor damage or refrigerant pressure imbalances. Bypassing can void manufacturer warranties and complicate service calls, since technicians must verify that any modification complies with safety standards and local codes. For property managers and homeowners, this risk translates into higher maintenance costs and longer downtime when a pro is required to correct faulty wiring or control logic.
From Heatpump Smart’s perspective, any nonstandard operation should be avoided. If a thermostat failure occurs, the recommended approach is to diagnose and repair or replace the thermostat using official manuals and parts. This not only preserves safety but also ensures the system’s performance aligns with energy-savings targets and climate comfort expectations.
Safer alternatives when the thermostat fails: what to consider
If you’re facing a thermostat failure, there are several safer routes you can pursue. First, replace the thermostat with a compatible unit from the same family or a manufacturer-approved model. Second, use the HVAC system’s service switch or dedicated emergency controls as described in the manual to perform a controlled test under safe conditions, not a full bypass. Third, set up an interim control method that adheres to the manufacturer’s guidelines—this might involve a temporary wall dimmer for a zone control, or a smart thermostat that can be wired to the existing control board under professional supervision. Heatpump Smart recommends documenting any changes and coordinating with a licensed technician to ensure the change is compliant and does not create safety hazards.
If you ever search for “how to turn on heat pump without thermostat,” you’re not alone; this is a common question during equipment downtime. However, the safer path is to pursue approved control methods and professional oversight to restore reliable operation without compromising safety or warranties.
How to diagnose thermostat failure without bypassing the system
Start by confirming the thermostat is the root cause rather than a minor wiring fault. Check whether the thermostat is receiving power and sending a heat call when set to heat. Use a multimeter to test 24V AC at the thermostat terminals and verify that the power supply is stable. If power is present but the device won’t call for heat, the issue may be internal to the thermostat or its wiring. Inspect the thermostat’s wiring connections at both the thermostat and the control board for loose or corroded contacts. If the display is blank or erratic, the thermostat itself is a likely culprit. In many cases a replacement thermostat resolves the problem without impacting the rest of the system.
When to call a professional and what to expect
If basic checks point to thermostat failure or wiring damage, contact a licensed HVAC technician. A pro can test control circuits, confirm 24V supply, inspect the control board, and verify safe operation. They can also identify whether an external safety switch is tripped, whether a wiring harness needs replacement, or if a thermostat replacement is required. Expect a diagnostic visit to include a physical inspection, a wiring schematic review, and verification of system performance across heating and cooling modes. Heatpump Smart’s team notes that professional assessment often prevents further damage and saves on downtime and energy costs.
Planning for prevention: maintenance and testing to avoid thermostat trouble
Proactive maintenance reduces thermostat-related failures. Schedule annual checks of wiring integrity, fuses, and the 24V power supply. Replace old or damaged thermostat components promptly and ensure the chosen thermostat is compatible with your heat pump model. Keep a maintenance log and photograph wiring connections after any service. Regular filter changes, coil cleaning, and refrigerant checks improve system responsiveness and help keep thermostat controls accurate. Heatpump Smart recommends including thermostat testing in your routine seasonal maintenance to maintain comfort and efficiency.
Quick troubleshooting checklist for homeowners
- Check that the outdoor unit disconnect is on and the breaker is not tripped.
- Inspect thermostat wiring for loose connections or damaged insulation.
- Verify there is 24V AC supply to the thermostat when the system is powered.
- Look for error codes on the thermostat display and consult the manual.
- Do not bypass the thermostat; schedule a professional evaluation if the problem persists.
- Document readings and steps taken for tech support and warranty purposes.
Tools & Materials
- multimeter (for 24V AC testing)(Check voltage at thermostat and control board terminals)
- non-contact voltage tester(Quick safety check before opening panels)
- screwdriver set(For panel access and wiring connections)
- Thermostat wiring diagram/manual(Model-specific wiring details and safety procedures)
- Safety goggles and gloves(Personal protection during diagnostics)
- camera or notebook(Document wiring and setup before changes)
Steps
Estimated time: 60-120 minutes
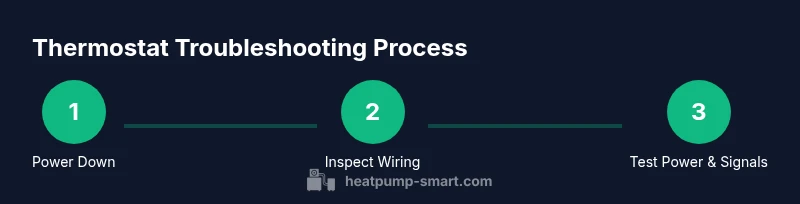
- 1
Power down the system
Turn off power to the heat pump at the main service disconnect or breaker. This prevents accidental shock while inspecting wiring and controls.
Tip: Always verify power is off with a voltage tester before touching any components. - 2
Inspect thermostat wiring at both ends
Remove the thermostat cover and check for loose, damaged, or corroded wires at both the thermostat and the control board. Re-seat connections carefully if they appear loose.
Tip: Take a photo of the current wiring before adjusting to aid reassembly. - 3
Verify 24V AC supply to the thermostat
With a multimeter, confirm there is a stable 24V AC supply to the thermostat’s power terminals when the system is powered. If no power, trace back to the furnace/air handler or breaker.
Tip: If you don’t see 24V, don’t continue—there’s an upstream power issue that requires service. - 4
Inspect the outdoor unit’s disconnect and contactor
Ensure the outdoor disconnect is on and the contactor coil is receiving control voltage. Look for signs of a stuck or burnt contactor, which can prevent proper operation.
Tip: A stuck contactor should only be serviced by a professional. - 5
Check control board fuses and breakers
Inspect internal fuses or circuit breakers on the control board for trips or blows. Replace only with components specified by the manufacturer.
Tip: Using the wrong fuse can cause further damage or safety risks. - 6
Consult the manual for safe testing options
Refer to the heat pump’s service manual for any approved test procedures that don’t bypass safety controls. Follow manufacturer steps for attempting a controlled call for heat.
Tip: If the manual allows a safe test, document the outcome and revert to standard operation if unsure. - 7
Decide on thermostat replacement vs professional repair
If diagnostics point to a faulty thermostat, plan for a replacement with a model compatible with your system or schedule pro service for wiring, compatibility, and integration checks.
Tip: Avoid non-compatible HVAC components that can disrupt refrigerant cycles. - 8
Restore power and confirm operation
Reconnect power and test the system using an approved control method. Monitor indoor temperature and system cycling to ensure stable performance.
Tip: If any unusual noises, smells, or cycling occur, power down and call a pro immediately.
Your Questions Answered
Is it safe to run a heat pump without a thermostat?
No. A thermostat provides essential control and safety protections. Bypassing it can damage equipment, create safety hazards, and void warranties.
No. Running without a thermostat removes crucial safety controls and can void warranties.
What usually causes thermostat failure in heat pumps?
Common causes include power supply issues, damaged wiring, blown fuses, or a faulty thermostat unit. Regular wear and incorrect installation can also contribute.
Thermostat failures are often due to wiring or power issues and can be fixed by replacement or repair.
Can I manually override a heat pump to call for heat?
Manual overrides are not recommended unless specifically supported by the manufacturer. They can bypass safety features and should only be done under professional guidance.
Only use manufacturer-approved methods; manual overrides can be unsafe.
What steps should I take if my heat pump won’t start and the thermostat is faulty?
First, verify power and basic wiring. If the thermostat is faulty, replace it or consult a pro to ensure safe operation and proper integration with the system.
Check power, then replace the thermostat or call a technician to avoid hazards.
How long does thermostat replacement usually take?
Replacement time depends on the model and accessibility but typically ranges from 30 minutes to a couple of hours when done by a professional.
Replacement usually takes about 30 minutes to a couple of hours, depending on access and model.
Should emergency heat be used as a workaround?
Emergency heat is a temporary mode designed for cold conditions or when the heat pump is offline. It’s not a fix for thermostat issues and should be used only as advised by a professional.
Emergency heat is for temporary use when the heat pump is offline and should be used with caution.
Watch Video
Top Takeaways
- Avoid bypassing a thermostat; safety and warranties depend on proper controls.
- Diagnose power and wiring first before considering replacements.
- Use manufacturer-approved method or professional help for thermostat issues.
- Regular maintenance reduces thermostat-related failures over time.