Outside Heat Pump Unit Not Running: Troubleshooting Guide
A homeowner-friendly troubleshooting guide for: outside heat pump unit not running. Learn common causes, safe checks, diagnostic flow, and when to call a pro to restore comfort and energy efficiency.

Most likely, the outdoor heat pump unit not running is a power or control issue. Start by checking the outdoor disconnect and the main HVAC breaker, then reset any tripped breakers. If power is arriving at the unit but it still won’t start, inspect the thermostat and contactor, and call a pro for further testing.
Why the outside heat pump unit not running matters
If you notice the outside heat pump unit not running, you’ll likely feel uncomfortable as temperatures shift. Diagnosing quickly saves energy and prevents further damage. According to Heatpump Smart, most non-running outdoor units are caused by simple power or control issues rather than a failed compressor. The Heatpump Smart team found that starting with power and control checks dramatically reduces repair time for homeowners, builders, and property managers. This guide helps homeowners take quick, safe steps while clearly signaling when professional help is needed.
When a unit refuses to start, the problem could be as simple as a tripped breaker or a faulty contactor. Getting the basics right improves reliability and avoids unnecessary parts replacement. You’ll learn to distinguish between electrical faults, thermostat misreads, and mechanical issues so you can act with confidence and reduce downtime.
Common causes you should know
Outdoor heat pump failures usually stem from four broad categories: power and control faults, thermostat or sensor errors, component failures in the outdoor unit (like the contactor or capacitor), and weather-related issues such as ice buildup or debris blockages. Power issues are by far the most common, often traced to tripped breakers, blown fuses, or a disconnected service switch. Thermostat inaccuracies can also make the system behave as if it’s not calling for cooling or heating. If the outdoor unit tries to start but stalls, you may be dealing with a stuck relay or a failing capacitor. Finally, environmental factors—rust, dirt, leaves, or ice—can prevent proper operation even when electrical systems are sound.
Understanding these categories helps you triage safely: start with power checks, then verify controls, and finally inspect the outdoor environment for obstructions and frost. Heatpump Smart analysis shows that most calls for service after hours are unnecessary if the basics are verified first.
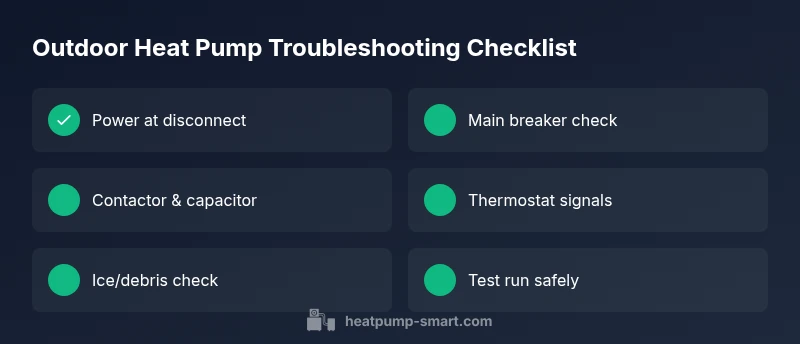
Quick checks you can perform safely
Before touching any equipment, switch off power at the outdoor disconnect and, if possible, the main service panel. Then perform these quick checks:
- Confirm the outdoor disconnect switch is in the ON position and the appears intact.
- Check the main HVAC breaker; reset any tripped breakers.
- Listen for a humming sound from the outdoor unit when the thermostat calls for cooling or heating; a buzzing noise can indicate a relay or capacitor fault.
- Verify thermostat settings and mode (cool/heat) match the current climate; a misread sensor can stop the unit from engaging.
- Inspect the outdoor coil for ice buildup or debris; heavy ice or leaves can block airflow and stall operation.
- Look for obvious signs of damage, burning smell, or loose wiring; never touch exposed conductors.
These checks cover the most common, non-technical causes and are safe enough for a proactive homeowner to perform without tools. If you detect burnt smell, visible arcing, or you’re unsure about wiring, stop and call a professional. Heatpump Smart emphasizes safety first—power must be disconnected before any inspection.
Diagnostic flow: symptom to diagnosis to solution
When the outdoor unit isn’t running, follow this logical flow to pinpoint the issue and determine the right fix:
- Symptom: Outdoor unit won’t start, no fan, no compressor activity.
- Check power: Is power reaching the unit (disconnect ON, breaker not tripped)? If yes, move to the next step. If no, restore power or call an electrician.
- Check contactor and capacitor: A failed contactor or swollen capacitor commonly causes a no-start condition or intermittent operation.
- Thermostat and sensors: Confirm thermostat signals and sensor readings align with current settings; miscommunication can prevent startup.
- Environmental factors: Ice, debris, or poor airflow can mimic electrical failures.
- Solution path: If power is present and electrical components test okay, consider thermostat replacement or a professional diagnostic for refrigerant and compressor issues.
If any step reveals a safety concern or obvious damage, stop and contact a licensed HVAC technician. This structured approach minimizes wasted service calls and speeds up recovery.
Step-by-step: most common fix for power-related issues
- Turn off power at the outdoor disconnect and switch off the main breaker to enter a safe state. 2) Clear the area around the outdoor unit; ensure there is at least 2 feet of clearance for airflow. 3) Verify the outdoor disconnect is ON and that wiring isn’t loose or corroded. 4) Reset the main HVAC breaker and the outdoor disconnect; wait 60 seconds, then re-energize. 5) If the system still doesn’t engage, inspect the contactor; a pitted or burnt contactor requires replacement. 6) Check the capacitor for bulging or leakage signs; a failed capacitor can prevent startup or cause a hum without full operation. 7) Restore power and test the system by setting the thermostat to cool/hear and listening for the contactor click and compressor start. 8) If there is still no operation, contact a licensed technician to test voltages, refrigerant levels, and internal components.
Tip: Always document the trip history and breaker positions before resetting—this can help the technician diagnose faster. Estimated time: 45-60 minutes.
Safety tips, notes, and mistakes to avoid
- Safety first: de-energize the system before touching wiring or components.
- Do not bypass the disconnect or jumper power; this can cause electrical shock or fire hazards.
- Avoid touching refrigerant lines or the compressor while energized; refrigerants can cause harmful exposure.
- Do not ignore ice buildup; it can indicate low refrigerant or airflow problems that require professional service.
- If you smell burning, hear crackling, or see melted insulation, leave the area and call a qualified HVAC technician immediately.
- Keep a simple maintenance routine to prevent issues, such as clearing debris and checking airflow seasonally.
Maintenance to prevent outdoor unit outages
Routine upkeep helps keep the outside heat pump unit running smoothly. Create a seasonal checklist that includes:
- Clear leaves, snow, and debris from around the outdoor unit.
- Inspect the contactor and wiring for wear; look for discoloration or buzzing noises.
- Clean the condenser coils every 6–12 months with a soft brush or gently rinse with water from the top down.
- Check defrost control if you have a heat pump that deals with cold climates; verify that defrost cycles occur as expected.
- Inspect the thermostat wiring and settings; replace batteries or update controls as needed.
- Schedule annual professional maintenance to check refrigerant levels, electrical connections, and system charging.
When to call a professional and what to expect
If the outdoor unit still won’t run after basic power and control checks, it’s time to bring in a pro. A licensed HVAC technician will test voltage at the disconnect, examine the contactor and capacitor under load, check refrigerant pressures, and test the defrost or emergency heat functions. Expect a quick safety assessment, a written estimate, and a discussion about potential part replacements. Having documentation of what you’ve already checked will speed up the process. Heatpump Smart recommends initiating professional service when you hear buzzing, smell burning, or notice moisture or ice on electrical components.
Quick prevention plan for the season
To minimize the chances of outdoor unit outages, establish a simple seasonal routine. Inspect the area around the unit, keep it clean, and replace frayed wiring or rusted components. Schedule a professional check before peak seasons, especially before heat waves or deep freezes. Use a consistent thermostat calibration method and replace air filters regularly; a clean system runs more reliably. By following these steps, you can reduce downtime and maintain energy efficiency, keeping your home comfortable year-round.
Steps
Estimated time: 45-60 minutes
- 1
Power off and prep the area
Turn off power at the outdoor disconnect and the main panel. Remove any nearby debris and clear a safe workspace. This protects you from shock and keeps you safe while inspecting components.
Tip: Never touch exposed conductors; keep kids and pets away during inspection. - 2
Check disconnect and breaker
Confirm the outdoor disconnect is ON and inspect the main HVAC breaker for trips. If a breaker is tripped, reset it and try the system again after a minute.
Tip: If the breaker trips again, this indicates a deeper electrical fault—call a pro. - 3
Inspect the contactor and capacitor
Look for signs of a burnt smell, melted insulation, or a swollen capacitor. Replace the contactor if the contacts are pitted or welded shut.
Tip: Only handle capacitors after they’ve discharged; discharge with caution or have a pro handle it. - 4
Check thermostat signals
Ensure the thermostat is calling for the correct mode (heat or cool) and that the wiring between the thermostat and outdoor unit is intact.
Tip: A misconfigured thermostat can mimic a power issue. - 5
Assess airflow and ice buildup
Check for ice on the outdoor coil or obstructions near the unit. Clear debris and allow airflow to resume. If ice persists, do not run the unit.
Tip: Ice can indicate refrigerant or airflow problems requiring professional diagnosis. - 6
Test run and observe
Power the system back on and set to cooling or heating. Listen for the contactor click and the compressor start. If nothing happens, stop and contact a technician.
Tip: Document any new noises or smells to share with the tech.
Diagnosis: Outdoor heat pump unit won't run
Possible Causes
- highPower issue (tripped breaker, blown fuse, or disconnected power)
- highFaulty contactor or capacitor in the outdoor unit
- mediumThermostat misreadings or sensor error
- mediumIce buildup or debris blocking airflow
- lowWiring damage or loose connections
Fixes
- easyCheck outdoor disconnect and main HVAC breaker; reset any tripped breakers
- mediumInspect contactor and capacitor; replace if bulged or burnt
- easyVerify thermostat settings and sensor readings; recalibrate or replace as needed
- easyRemove ice/debris and ensure proper airflow; clean condenser coils
- mediumReplace damaged wiring and secure connections; test voltages
Your Questions Answered
What is the most common cause of an outdoor heat pump not starting?
Power issues (tripped breakers, disconnected power) and faulty contactors are the most frequent culprits. Start with the disconnect and breaker checks before evaluating internal components.
Most outdoor-unit start failures come from power or relay problems. Check the disconnect and breaker first.
Should I run the unit if I see ice on the outdoor coils?
No. Ice buildup indicates airflow or refrigerant problems and can damage the compressor. Turn the system off and let it thaw, then inspect for airflow obstructions.
If you see ice, don’t run the unit. Let it thaw and have it checked for airflow or refrigerant issues.
What safety steps should I take before inspecting the outdoor unit?
Always switch off power at the outdoor disconnect and main panel before touching components. Keep area clear and avoid touching electrical wiring.
Power off first at the disconnect and main panel; stay safe and avoid touching wires.
Can thermostat settings cause the outdoor unit to not run?
Yes. If the thermostat is miscalibrated or miswired, it may not signal the outdoor unit to start. Verify mode, temperature, and wiring.
Sometimes the problem is the thermostat—double-check mode and wiring.
When is it appropriate to call a professional?
If you have checked power, wiring, contactor, and capacitors and the unit still won’t run, or you hear buzzing or burning smells, contact a licensed HVAC technician.
If basic checks don’t fix it or you hear buzzing or smell burning, call a pro.
Can a clogged filter cause the outdoor unit to stop?
A clogged indoor filter won't stop the outdoor unit on its own, but it can reduce overall system efficiency and trigger safety shutoffs. Check and replace filters regularly.
A dirty filter affects indoor airflow, not directly the outdoor unit, but it’s good to keep it clean.
Watch Video
Top Takeaways
- Start with power and control checks to resolve most outdoor-unit failures
- Inspect the outdoor unit’s contactor and capacitor if it won’t start
- Clear debris and ice, ensuring proper airflow for reliable operation
- Know when to call a pro: persistent electrical faults or refrigerant issues require expert service