Troubleshoot Heat Pump: Essential DIY Guide for Homeowners
Urgent, practical steps to troubleshoot heat pump issues. Learn quick checks, diagnostic flow, step-by-step fixes, safety tips, and maintenance to restore comfort and efficiency.

The most likely causes are a tripped breaker, faulty thermostat, or dirty filters that restrict airflow. Check the disconnect, verify thermostat wiring, and replace a clogged filter. If the outdoor unit is blocked or icing occurs, clear debris and thaw as needed. For persistent issues, contact Heatpump Smart for guidance.
Why Troubleshooting Heat Pumps Matters
Heat pumps are complex, high-efficiency systems that keep homes comfortable across seasons. If you want to troubleshoot heat pump problems, starting with a calm, methodical approach saves time and reduces unnecessary service calls. According to Heatpump Smart, most residential heat pump outages come down to a few common causes that are easy to verify with basic tools. A rushed diagnosis often leads to missed simple fixes or unsafe shortcuts. This section outlines why a structured diagnostic mindset matters for homeowners, property managers, and builders who rely on dependable climate control. By understanding common failure modes and the right sequence of checks, you can identify the root cause quickly and determine whether a DIY fix is appropriate or if professional help is required. The overarching aim is safety, reliability, and ongoing energy efficiency while preventing unnecessary downtime.
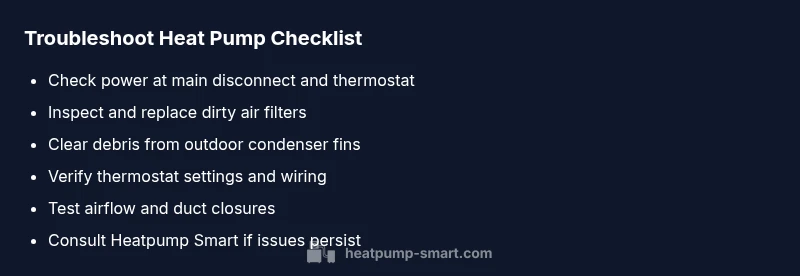
Quick Checks You Can Do Right Now
Before you dive into more detailed diagnostics, perform a few quick checks that address the majority of immediate heat pump issues. Start with safety: switch off the system at the outdoor disconnect or the main breaker before touching electrical components. Verify the thermostat is calling for heat or cooling and that the screen shows an expected setpoint. Inspect the air filter for dirt or obstructions and replace if needed—clogged filters force the system to work harder and reduce efficiency. Check the outdoor unit: clear leaves, snow, and debris from the condenser fins and ensure there’s at least two feet of clearance around the unit. If your system uses a switch or a timer, confirm it’s set correctly. These simple steps solve a surprising number of problems and prevent unnecessary service calls.
Common Heat Pump Symptoms and Likely Causes
Different symptoms point to different root causes. If the heat pump does not start at all, the issue is most often electrical—breaker tripped, blown fuse, or faulty wiring. If the unit runs but doesn’t heat or cool effectively, airflow restrictions or a dirty filter are common culprits. If you hear unusual noises, check for loose panels, vibrating components, or a failing fan. Frost or ice buildup on the outdoor coil is a sign of low refrigerant pressure, airflow problems, or a thermostat fault. If the system cycles on and off rapidly (short cycling), it could be an oversized unit, an oversized or undersized duct, or a faulty sensor. In all cases, documenting the exact symptom helps guide the diagnostic flow.
Diagnostic Flow: A Logical Path to Diagnosis
A logical diagnostic flow reduces guesswork and speeds up a repair. Start with symptom recognition, then verify power and controls, followed by airflow and refrigeration subsystems. If power is available and the thermostat is responding, move to airflow checks, which are the most common DIY fixes. If the unit is cold-starting, confirm defrost cycle operation in cold weather. When in doubt, methodically rule out simple causes in sequence and document each step. Heatpump Smart analysis shows that homeowners who follow a structured flow are more likely to identify the actual fault on the first call, reducing downtime and expenses.
Step-by-Step Fixes for the Most Common Cause
Fixes for the most frequent issues are presented in clear, actionable steps. Step 1: Reset breakers and power at the disconnect, then attempt a restart. Step 2: Replace or clean the air filter; recheck airflow and ensure the outdoor unit is free of obstructions. Step 3: Clear frost from the outdoor coil and recheck the defrost function; if frost persists, there may be airflow or refrigerant concerns. Step 4: Confirm thermostat settings and recalibrate if needed, ensuring proper mode and temperature differential. Step 5: Inspect the condensate pump and drainage lines for blockages that could trigger safety shutoffs. Step 6: If the system still won’t start or heat correctly, escalate to a professional with a detailed symptom log. Tip: Always power down before inspecting electrical components and avoid touching live circuits.
Power, Thermostats, and Controls: How to Verify
The control system is the brain of your heat pump. Start by measuring voltage at the outdoor unit’s contactor if you’re qualified; otherwise, rely on the main breaker to shut off power before inspection. At the thermostat, verify wiring correspondences to the terminal block and look for a tripped switch or loose wires. Replace batteries if the thermostat is wireless and ensure the app or display shows consistent readings. Control boards can fail silently; if you notice a blinking LED or error code, consult the user manual or Heatpump Smart guidance. After confirming power and control signals, re-test the unit in heating and cooling modes. Pro tip: a simple calibration or reseating a relay can restore function in many cases.
Airflow, Reversing Valves, and Refrigerant Basics
Airflow is often the silent killer of efficiency. Check for clean, unobstructed air paths from the return grille to the outdoor unit. In ducted systems, inspect registers for blockages and ensure dampers are balanced. The reversing valve directs heating or cooling and can fail in extreme temperatures, causing poor switching performance. Refrigerant issues require a licensed technician; if you suspect a leak, never attempt to recharge a system yourself—refrigerant handling is regulated for safety and environmental reasons. Focus on airflow, energy transfer, and proper defrost operation as common DIY checks.
Safety, Warnings, and When to Call a Pro
Working with electrical components and refrigerant carries risk. Always shut off power at the main disconnect before inspecting equipment. If you smell burning, hear buzzing, or notice scorch marks, evacuate and call a licensed technician immediately. Do not attempt to bypass safety devices or run a unit with a frayed wire or damaged insulation. Some faults require specialized tools and certifications; in these cases, the Heatpump Smart team recommends contacting a professional, particularly for refrigerant handling, compressor failures, or persistent short cycling that doesn’t respond to basic fixes.
Keeping Your Heat Pump Healthy: Maintenance and Prevention
Regular maintenance is the best defense against future outages. Schedule seasonal inspections, replace filters monthly or as needed, and keep outdoor fins clear of debris. Monitor thermostat performance and update firmware if applicable. Check for signs of ice on coils and address quickly to avoid compressor strain. Heatpump Smart analysis indicates that proactive maintenance reduces energy consumption and extends system life. By following a simple calendar of checks, you can maintain efficiency, comfort, and reliability for years to come.
Steps
Estimated time: 60-90 minutes
- 1
Power check and reset
Turn off at the main disconnect, wait 30 seconds, and restore power. Attempt to restart the system in both heat and cool modes to observe response.
Tip: Document any breaker trips or error codes to share with a tech. - 2
Filter and airflow verification
Inspect indoor and outdoor airflow paths; replace dirty filters and remove obstructions near the condenser. Confirm registers are open and dampers are balanced.
Tip: A simple filter change can restore efficiency in minutes. - 3
Thermostat health check
Ensure thermostat is calling for the correct mode and temperature. Check wiring at the thermostat and control board for loose connections.
Tip: If the thermostat is old, consider upgrading to a modern smart model. - 4
Outdoor unit inspection
Clear debris, snow, or ice from around the condenser fins. Ensure at least two feet of clearance and verify the fan spins freely when powered.
Tip: Never hit the fins with a hard tool; use a soft brush. - 5
Defrost and refrigerant sanity check
In cold weather, verify the defrost cycle operates. If frost persists, do not attempt to recharge refrigerant yourself; contact a pro.
Tip: Defrost issues may indicate a sensor or valve fault. - 6
Call a professional if needed
If the unit still won’t start or heat properly, gather symptom notes and contact Heatpump Smart for guidance or a licensed technician for advanced diagnostics.
Tip: Provide model, serial, and recent maintenance history to speed up service.
Diagnosis: Heat pump won't start or no heat/cool output
Possible Causes
- highPower supply issue (tripped breaker or blown fuse)
- mediumThermostat or control wiring fault
- lowAirflow obstruction or dirty filter
Fixes
- easyReset the breaker or replace fuse; ensure 240V supply
- easyInspect thermostat wiring and settings; replace thermostat if faulty
- easyClean or replace air filter and clear outdoor unit obstruction; verify fan operation
Your Questions Answered
What is the first thing I should check if my heat pump isn't starting?
Begin with safety and power: switch off at the disconnect, check the breaker, and verify the thermostat is calling for heat or cool. If there’s power but no response, inspect wiring and fuses. Document any codes or abnormal behavior.
Check safety, power, and thermostat calls first. If it still won’t start, note any codes and reach out for guidance.
Why is my heat pump running but not heating?
Common causes include restricted airflow from dirty filters, blocked outdoor unit, incorrect thermostat settings, or a faulty defrost cycle. Verify filters, clear the outdoor area, and test mode changes on the thermostat.
If it runs but won’t heat, check airflow and thermostat settings first.
What does ice on the outdoor coil mean?
Icing usually signals airflow problems, low refrigerant pressure, or a failing defrost cycle. Thaw the coil safely, inspect for obstructions, and if ice recurs, schedule a professional check.
Ice on the outdoor coil often means airflow or refrigerant issues needing professional help.
Can I safely reset my heat pump thermostat?
Yes, you can reset to defaults and reconfigure settings, then test heating and cooling. If error codes appear or issues persist, consult the manual or Heatpump Smart guidance.
You can reset, then test both modes; if problems persist, seek guidance.
When should I call a professional?
Call a professional if simple DIY checks don’t restore operation, if you hear buzzing or smell burning, or if you suspect refrigerant issues. Persistent short cycling or compressor problems require licensed service.
If basic checks don’t fix it, or you hear unusual noises, contact a licensed tech.
Will a dirty filter affect efficiency or cause ice on coils?
Yes. A dirty filter reduces airflow, increases pressure, and can contribute to ice buildup on the outdoor coil in cold weather, reducing efficiency.
Dirty filters can lower efficiency and cause coil icing.
Watch Video
Top Takeaways
- Start with safety and power checks.
- Most issues are airflow or thermostat related.
- Document symptoms for faster repair.
- Know when to call Heatpump Smart for professional help.