Signs of a Broken Heat Pump: Troubleshooting Guide
Urgent guide to identifying signs of a broken heat pump, quick checks, and step-by-step fixes to restore comfort and curb energy waste. Heatpump Smart offers practical, safe troubleshooting for homeowners, builders, and managers.

Common signs of a broken heat pump include inadequate heating or cooling, strange noises, ice buildup on the outdoor coil, and rising energy bills. Start with the thermostat, circuit breakers, and air filters. If the issue persists, contact a licensed technician for a full diagnostic and potential refrigerant or compressor problems.
What the signs mean for your comfort and energy
When you start noticing signs of a broken heat pump, your first instinct should be to act quickly. In many homes, symptoms like uneven heating or cooling, longer run times, or a rising energy bill are early hints that the system is struggling. The keyword here is signs of a broken heat pump, because catching these alerts early can prevent bigger damage and higher repair costs. According to Heatpump Smart, most problems originate from airflow issues, electrical faults, or control-system glitches. In practice, you’ll see four broad categories: airflow and temperature inconsistencies, unusual noises or vibrations, icing on the outdoor unit, and frequent cycling. This guide centers on practical checks you can perform safely and when to seek professional help. If you smell burning plastic or hear arcing noises, shut off the unit at the breaker immediately and call a licensed technician. Safety is non-negotiable, even when you’re trying to troubleshoot quickly.
Common signs of a broken heat pump
- Not heating or cooling to setpoint: If rooms never reach the thermostat, the unit is failing to respond to demand.
- Short cycling (frequent on/off): This wastes energy and accelerates wear on fans and compressors.
- Ice or frost on the outdoor coil: Ice indicates refrigerant issues or airflow blockages.
- Unusual noises or vibrations: Rattling, grinding, or squealing can point to loose parts or a failing compressor.
- Weak or inconsistent airflow from vents: Blocked ducts, clogged filters, or fan problems reduce comfort.
- Higher energy bills with the same usage: A system working harder without delivering more comfort.
- Outdoor unit refuses to run or repeatedly trips the breaker: Electrical or compressor faults often show up here. These indicators collectively form the signs of a broken heat pump. If multiple signs appear at once, prioritize safety and contact a pro rather than attempting risky DIY fixes.
Quick checks you can safely perform
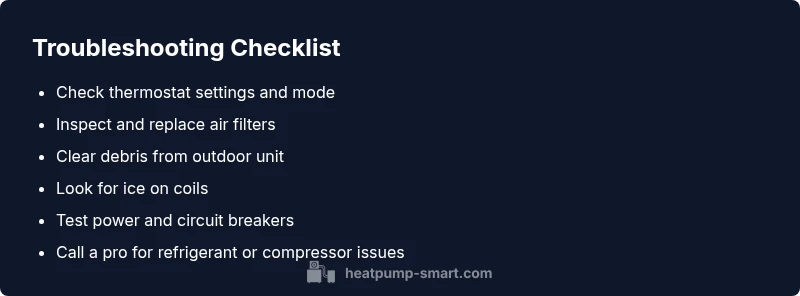
- Check thermostat settings: Ensure the mode (heat or cool) matches the time of year and setpoint. A simple misconfiguration can masquerade as a bigger problem.
- Inspect indoor air filters: A dirty filter restricts airflow, making the system work harder and feel like a failure. Replace with a compatible filter as soon as possible.
- Clear the outdoor unit of debris: Leaves, grass, and dirt reduce heat transfer. Gently remove debris and rinse away dust if safe to do so.
- Verify electrical power: Check the fuse box and circuit breakers for trips. Reset if appropriate and watch for repeated trips, which signal a bigger electrical issue.
- Look for ice on coils: Ice buildup suggests airflow or refrigerant problems. Do not chip ice aggressively; instead, turn the unit off and let it thaw while arranging service.
- Listen for abnormal noises: Strange whines, grinding, or banging can indicate loose components or a failing fan motor. If these quick checks don’t restore expected performance, proceed with a professional diagnosis.
Diagnostic flow overview
A systematic approach helps distinguish simple, fixable issues from serious failures. Start with the symptom you observe, map it to the most likely causes, and apply the corresponding fixes in order of ease. For example, if you have weak airflow, begin with filters and ductwork, then check the outdoor unit for obstructions, before investigating refrigerant or compressor concerns. This flow prioritizes safety and minimizes unnecessary costs. Heatpump Smart’s guidance emphasizes documenting each check—note the symptom, the action taken, and the result—to share with a technician later.
Step-by-step: fix for the most common cause (dirty filters / airflow)
- Power down the system and locate the air filter compartment. 2) Remove the filter and inspect for dirt or dust buildup. 3) Replace with a filter of the correct MERV rating and size. 4) Reassemble and power the system back on. 5) Run a test cycle and observe airflow at multiple vents.
Tip: Keep spare filters on hand and schedule a quarterly filter check to prevent buildup.
Note: If airflow remains weak after a new filter, there may be duct leaks or a faulty blower motor requiring professional attention.
Safety and prevention reminders
- Always shut off power at the breaker before inspecting electrical connections or the outdoor unit.
- Use the correct PPE (gloves, eye protection) when handling fans or opening panels.
- Do not attempt refrigerant work yourself; refrigerants require licensed handling.
- Schedule regular preventive maintenance to catch problems early, especially before peak heating or cooling seasons.
- Keep the outdoor unit clear of nearby vegetation and debris to maintain efficient airflow.
Prevention tips to avoid future breakdowns
- Schedule annual professional tune-ups that include refrigerant checks, electrical inspections, and thermostat calibration.
- Replace or clean air filters every 1–3 months depending on usage and household conditions.
- Install a smart thermostat to maintain stable setpoints and reduce unnecessary cycling.
- Seal ductwork and insulate the home to reduce load on the heat pump and improve efficiency.
- Monitor energy bills for sudden changes and investigate promptly.
Steps
Estimated time: 60-90 minutes
- 1
Power down and prep
Turn off the heat pump at the breaker to ensure safety during inspection. Gather a flashlight, a clean cloth, and replacement filters if needed. Confirm you have the unit’s model number and access to the air filter compartment.
Tip: Never work on electrical components with the power on; always lockout/tagout if possible. - 2
Check thermostat settings
Verify that the thermostat is set to the correct mode (heat or cool) and the desired temperature. If the thermostat has a fan setting, ensure it is in auto rather than on. If the thermostat is remote-controlled, check for any sleep or override modes.
Tip: Consider placing a simple, fixed setpoint for testing to avoid drift during trials. - 3
Inspect and replace air filters
Open the filter access panel and remove the existing filter. If dusty or dark with debris, replace it with a new one of the correct size and rating. Re-seat the panel securely.
Tip: Write the replacement date on the filter for future maintenance planning. - 4
Examine the outdoor unit
Check for leaves, dirt, or vegetation near the outdoor condenser. Clear a clear 2–3 feet around it and gently wipe away surface dust. Ensure the fan spins freely when powered on.
Tip: Never put hands into a running fan; maintain a safe distance during inspection. - 5
Check for ice on coils
Look for visible ice on the evaporator coil inside or the outdoor coil. If ice is present, turn the system off and let it thaw before testing again. Ice usually signals airflow or refrigerant issues.
Tip: Avoid chiseling ice; rapid thaw and proper service are safer and more effective. - 6
Test electrical connections
With power off, inspect obvious wiring and connections at the access panels. If you notice loose wires or signs of burning, call a professional rather than attempting fixes.
Tip: If you must reset breakers, do so one at a time to identify the faulty circuit. - 7
Summarize and plan next steps
Record the observed symptoms, checks performed, and results. If symptoms persist after basic checks, schedule a professional diagnostic to test refrigerant levels and compressor health.
Tip: Provide the technician with your notes to speed up the repair.
Diagnosis: Heat pump runs but fails to reach the desired temperature
Possible Causes
- highAirflow restrictions (filters, ducts, outdoor debris)
- mediumThermostat or control-system fault
- mediumRefrigerant leak or low charge
- mediumElectrical issues (fuses, breakers, wiring)
- lowFaulty reversing valve (in heat pumps with two modes)
Fixes
- easyReplace or clean air filters; inspect ducts for blockages
- easyTest thermostat settings and recalibrate; replace batteries if needed
- hardHave a licensed tech check refrigerant levels and seal leaks if present
- mediumInspect electrical panels; reset or replace tripped breakers and check wiring connections
- hardEvaluate reversing valve operation and replace if faulty (professional only)
Your Questions Answered
What are the most common signs of a broken heat pump?
The most common signs include inadequate heating or cooling, longer run times, unusual noises, ice on the outdoor coil, weak airflow, and higher energy bills. If multiple signs appear, it's time to investigate further or contact a pro.
Common signs are inadequate heating or cooling, odd noises, ice on the outdoor coil, and higher energy bills. If you notice several, consider a professional check.
Can a dirty air filter cause heat pump issues?
Yes. A dirty filter restricts airflow, making the system work harder and reducing efficiency. Replacing the filter often resolves airflow-related problems quickly.
A dirty filter can cause reduced airflow and efficiency. Replacing it usually helps a lot.
Is it safe to reset the thermostat to troubleshoot?
Resetting briefly can clear minor control glitches, but it won't fix mechanical failures. If problems persist after a reset, proceed with a structured diagnostic flow or professional help.
You can reset the thermostat, but persistent issues require a proper diagnostic or professional help.
When should I call a professional?
Call a professional if you notice ice on coils, refrigerant odors, frequent breaker trips, or no improvement after basic checks. Refrigerant work and compressor issues require licensed technicians.
Call a professional if there’s ice on coils or refrigerant smells, or if basic checks don’t fix it.
How long does a refrigerant leak repair take?
Repair time varies with the leak size and system accessibility. A tech may complete a diagnostic and seal or replace components in a few hours, depending on parts availability.
Repair time depends on the leak; it can take a few hours to diagnose and fix.
Do heat pumps require regular maintenance to prevent breakdowns?
Yes. Regular maintenance—filters, coils, refrigerant checks, and electrical inspections—helps prevent common failures and keeps efficiency high.
Regular maintenance helps prevent breakdowns and keeps efficiency high.
Watch Video
Top Takeaways
- Identify signs early to prevent damage and high costs
- Start with simple checks before calling a pro
- If in doubt, prioritize safety and professional service
- Maintain regular preventive maintenance to extend life