Stuck Reversing Valve on Heat Pump: Troubleshooting Guide
Urgent troubleshooting guide to diagnose and fix a stuck reversing valve on heat pumps, with a step-by-step diagnostic flow, safe checks, and professional service guidance.

If your heat pump won’t switch modes, the reversing valve is the most likely culprit. A stuck valve or faulty actuator can force the system to run in the wrong mode, wasting energy and reducing comfort. Heatpump Smart strongly recommends turning off power and scheduling professional service if the problem persists today for safety before attempting checks.
What the reversing valve does and why it can get stuck
In a heat pump, the reversing valve switches the refrigerant flow to alternate between heating and cooling. When it operates correctly, the system delivers comfortable indoor temperatures with energy efficiency. But a stuck reversing valve on heat pump (either jammed in the cooling or heating position) forces the unit to stay in one mode, wasting energy and reducing comfort. According to Heatpump Smart analysis, a stuck reversing valve on heat pump is a common service call cause, especially in climates with wide temperature swings or after extended outdoor exposure. Causes range from motor/mechanical wear and coil contamination to electrical faults in the valve actuator. Understanding the valve’s role helps you spot symptoms early and decide whether to attempt safe checks or contact a professional. This article walks you through urgent troubleshooting steps, safety considerations, and best practices to get your heat pump back to efficient operation.
Signs your reversing valve is stuck and how it manifests
Symptoms of a stuck reversing valve on heat pump include the system staying in heating or cooling mode regardless of thermostat changes, continuous operation of the outdoor unit, and unexpected air temperatures indoors. You may also hear a faint click or buzz from the actuator, or observe a lack of response when cycling between modes. These indicators align with common failure modes described by Heatpump Smart, especially after seasonal transitions. Early detection helps prevent energy waste and reduces wear on compressor and coils.
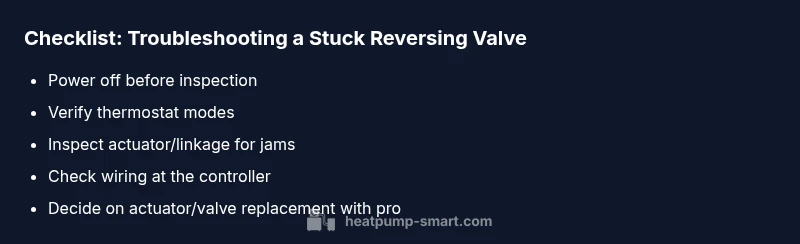
Safe, initial checks you can perform (without specialized tools)
Before calling a technician, perform a few low-risk checks. Verify thermostat settings and ensure the system isn’t in emergency heat or a manual override. Confirm indoor setpoints align with the desired operation and that the outdoor temperature is within typical operating ranges for heating or cooling. Inspect visible wiring at the outdoor unit for loose connections or corrosion, and ensure that the outdoor unit has clear airflow. If you can access the valve linkage safely, check for obvious obstructions or binding. Never open sealed refrigerant components or attempt refrigerant work; these tasks require a licensed professional. Recording symptoms, temperatures, and mode changes helps Heatpump Smart technicians diagnose faster.
Diagnostic flow overview for a stubborn stuck reversing valve on heat pump
This section outlines a practical path to identify the cause of a stuck reversing valve on heat pump. Start with simple checks (thermostat mode, wiring, outdoor temperature), then move to actuator operation and voltage checks if you have safe access. If the issue remains after these steps, the fault is likely in the valve actuator or valve assembly and will require professional service. Heatpump Smart’s diagnostic approach emphasizes safety and precise data collection to expedite repair.
Step-by-step fix for the most common cause: stuck actuator or mechanical jam
- Safety first: turn off power at the main breaker and lockout switch to prevent electrical shock or compressor restart during inspection. 2) Confirm mode and thermostat: set the thermostat to a known good cooling or heating setting and observe if the outdoor unit responds to mode changes. 3) Inspect the actuator linkages: check for visible obstruction, loose screws, or bent linkage; tighten fasteners if you find them and ensure the actuator can move freely. 4) Test actuator movement: gently cycle the valve position by hand only if the system design permits; note if the valve returns to a different position when released. 5) Check wiring: look for damaged insulation or loose terminals at the valve control wires and controller board; reseat connections if needed. 6) Replace the actuator or valve module if the movement is blocked or the valve shows obvious wear; this task should be done by a licensed technician. 7) After any repair, reset the system and monitor performance for 24–48 hours. If the heat pump still won’t switch modes, escalate to professional service. Pro tip: keep a record of the valve position outcomes and any noises you hear to speed up diagnosis by Heatpump Smart technicians.
Safety notes, prevention, and when to call a pro
A stuck reversing valve on heat pump involves electrical components and refrigerant systems; if you’re not trained, avoid opening sealed parts or handling refrigerant. Always shut off power at the breaker before inspecting any electrical connections. Regular maintenance, including filter changes, coil cleaning, and annual refrigerant and valve checks, reduces the chance of valve sticking. Weather exposure and dust buildup can contribute to actuator stiffness, so protect outdoor components with clear housing. If the valve remains stuck after basic checks or you observe refrigerant smell or oil at connections, call a licensed HVAC technician immediately. Heatpump Smart emphasizes safety and professional service for any refrigerant-related concerns.
Final checks and performance expectations after repair
Once the reversing valve issue is resolved, re-test each mode (cooling and heating) across different outdoor temperatures to verify proper valve positions. Expect slight short cycling during the first 24 hours as refrigerant pressures stabilize. Monitor indoor comfort and energy use; a properly functioning valve should restore energy efficiency and steady temperatures. Schedule a follow-up service if issues recur seasonally, as repeated sticking can indicate underlying wear that may require a valve replacement or actuator upgrade. Heatpump Smart’s guidance is to treat valve problems as an early warning, not a one-off fault, to protect equipment and comfort over time.
Steps
Estimated time: 60-90 minutes
- 1
Power down and verify safety
Shut off the main breaker and lockout switch to prevent accidental restart. Confirm there is no ongoing power to the outdoor and indoor units before touching any components.
Tip: Use a non-contact voltage tester to confirm power is off. - 2
Check thermostat settings
Set the thermostat to a stable cooling or heating mode and see if the outdoor unit responds. If changes are ignored, note the exact mode and outdoor temperature.
Tip: Document the mode changes and timing for the technician. - 3
Inspect actuator linkage
If you can access the valve actuator safely, look for obstructions, loose screws, or bent linkage that could prevent movement.
Tip: Do not force movement; report any resistance to a pro. - 4
Test actuator movement
Gently cycle the valve position by hand only if designed for manual movement. Observe whether the valve position changes and whether it returns to the same position when released.
Tip: Note any stiction or sticking points. - 5
Check related wiring
Inspect valve control wires and terminals for damaged insulation or loose connections; reseat or replace as needed, ensuring power remains off.
Tip: Keep track of all wire colors and terminal numbers. - 6
Decide on replacement
If movement is blocked, or the valve shows wear, plan actuator or valve module replacement by a licensed technician.
Tip: Ask about combined valve actuator and control board checks. - 7
System test post-repair
After repairs, restore power and test both cooling and heating modes across several cycles; monitor for proper valve positioning and stable temperatures.
Tip: Schedule a follow-up if symptoms recur.
Diagnosis: Heat pump won't switch between heating and cooling despite mode changes
Possible Causes
- highValve actuator failure or electrical fault
- mediumMechanical jam or obstruction in valve linkage
- lowWiring fault to valve controller or control board issue
Fixes
- easyTest actuator operation and verify valve movement with safe access; reseat wiring if loose
- easyInspect linkage for obstruction or wear and tighten/replace as needed
- mediumReplace actuator or valve module if movement is blocked or worn; professional service required
Your Questions Answered
What causes a reversing valve to get stuck on a heat pump?
Common causes include actuator failure, mechanical jam in the valve, and wiring faults. Seasonal exposure and dust can contribute to stiffness. A professional assessment is usually required to confirm the exact cause and safely perform replacements.
Common causes are actuator failure, mechanical jam, and wiring faults. Seasonal exposure can worsen stiffness; a licensed technician should confirm and repair.
Can I fix a stuck reversing valve myself?
For safety and refrigerant handling reasons, most fixes require a licensed HVAC technician. You can perform safe, non-invasive checks like thermostat settings and electrical safety, but avoid opening sealed refrigerant parts.
No, most reversing valve repairs should be done by a licensed technician due to safety and refrigerant handling.
How do I know if the valve actuator is failing?
Signs include unusual noises (buzzing/clicking), lack of valve movement when cycling modes, or inconsistent mode changes. A technician can test voltage and movement to confirm actuator health.
Listen for buzzing noises and check if the valve moves when you change modes—only a technician can safely verify electrical signals.
What safety steps should I take before inspecting the outdoor unit?
Always shut off power at the breaker, avoid touching high-voltage terminals, and keep clear of refrigerant lines. If you smell refrigerant or see oil, evacuate the area and call a pro.
Turn off power at the breaker before touching anything. If you smell refrigerant, call a professional right away.
How long does a reversing valve replacement take?
Timing varies by system, but a valve or actuator replacement typically requires 1–3 hours of labor plus parts. A site assessment is needed to confirm accuracy and availability.
It usually takes a few hours, depending on the system and parts availability.
When should I contact Heatpump Smart for help?
If you notice persistent mode issues, unusual noises, or refrigerant concerns after basic checks, contact Heatpump Smart for a professional diagnostic and safe repair guidance.
If issues persist after checks, contact Heatpump Smart for a professional assessment and safe repair.
Watch Video
Top Takeaways
- Start with safe, simple checks before deeper diagnostics
- A stuck reversing valve on heat pump is a common failure mode
- Do not DIY refrigerant work; call a licensed technician
- Document symptoms to speed up professional assessment
- Regular maintenance helps prevent valve sticking